To create the Frontend Project Manager page:
- Create a WordPress page that you would like to use as the Frontend Project Manager page by navigating to Pages > Add New.
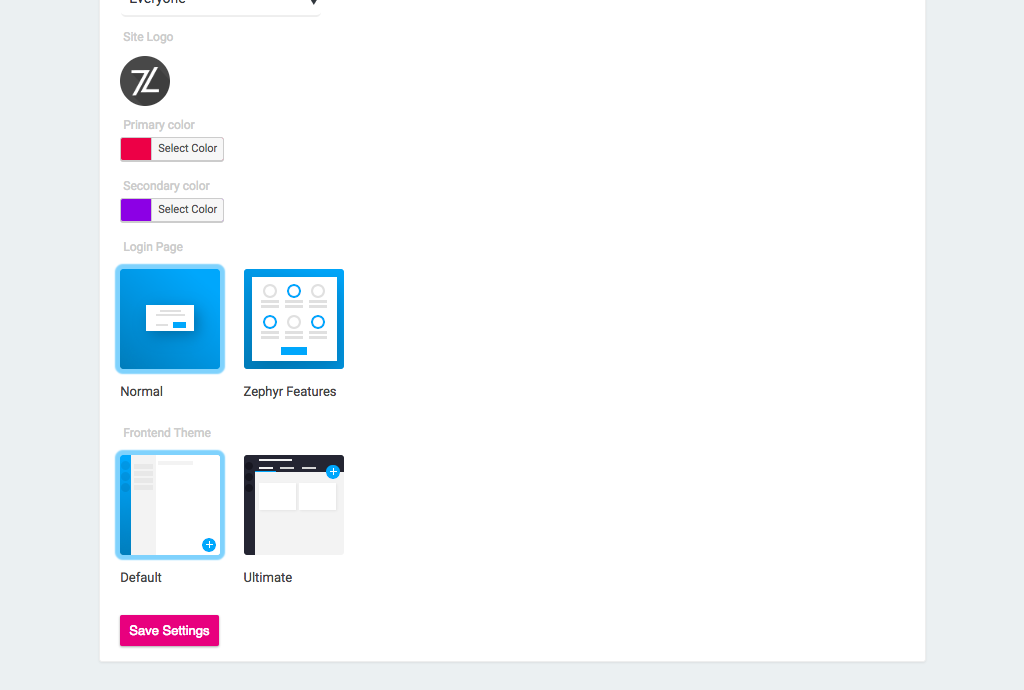
- Once created, navigate to Zephyr Project Manager > Settings > Frontend Settings and enable the option labelled ‘Enable Frontend Project Manager’
- From the ‘Frontend Project Manager Page’ option below it, select your page from the dropdown.
- You can customize the page, the colors used, the logo, the Frontend Project Manager theme and more.
- Once done, press save and you will now be able to view the Frontend Project Manager page when visiting your created page.
This is how the frontend project manager is set up and there are many more settings and options to change from the settings to customize it to your brand. You can also add your own custom pages as well as adding shortcodes and content to the dashboard.
Frontend Project Manager
(Note: This feature is only available in the Pro version)
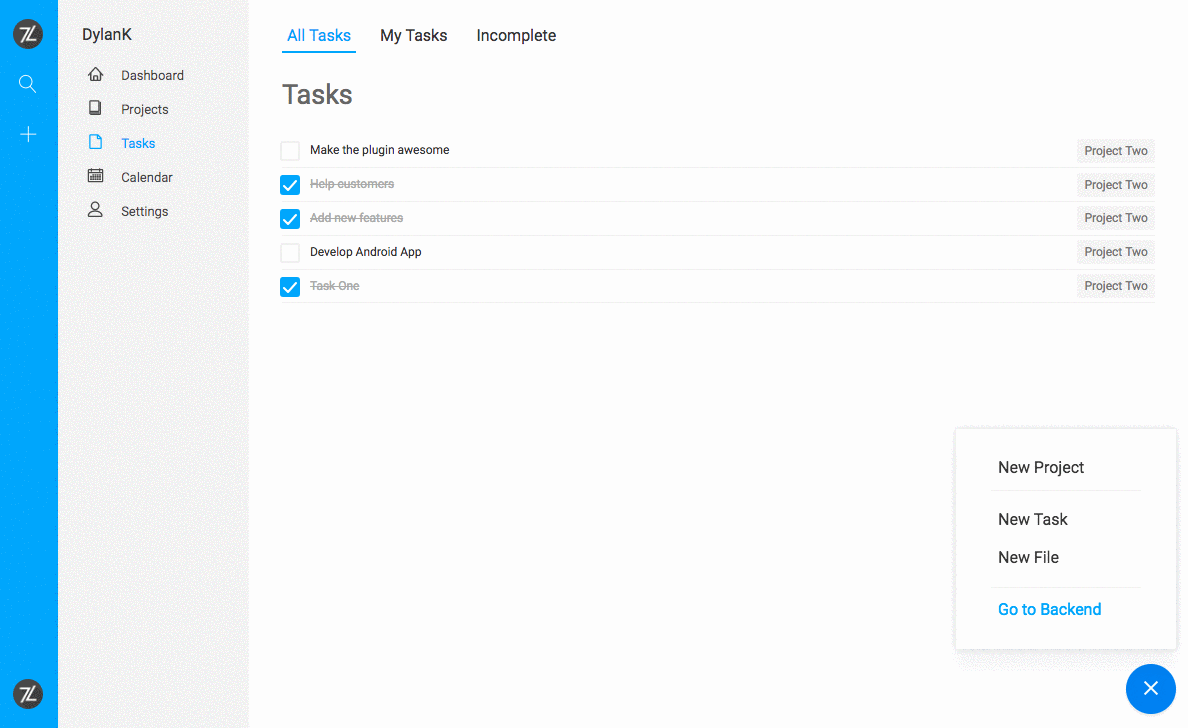
The Frontend Project Manager allows you to add the project manager interface to your frontend with a beautiful layout and customized design.
Enabling the Frontend Manager
To enable the Frontend Manager, please navigate to Zephyr Project Manager > Settings > Frontend Settings and check the checkbox under the option Enable Frontend. You can also customize the permissions from this page as well as the colours and the logo used in the frontend.
You will also need to select the page you would like to use for the frontend interface under the option Front-End Project Page or create a new page for this.
Using the Frontend Manager
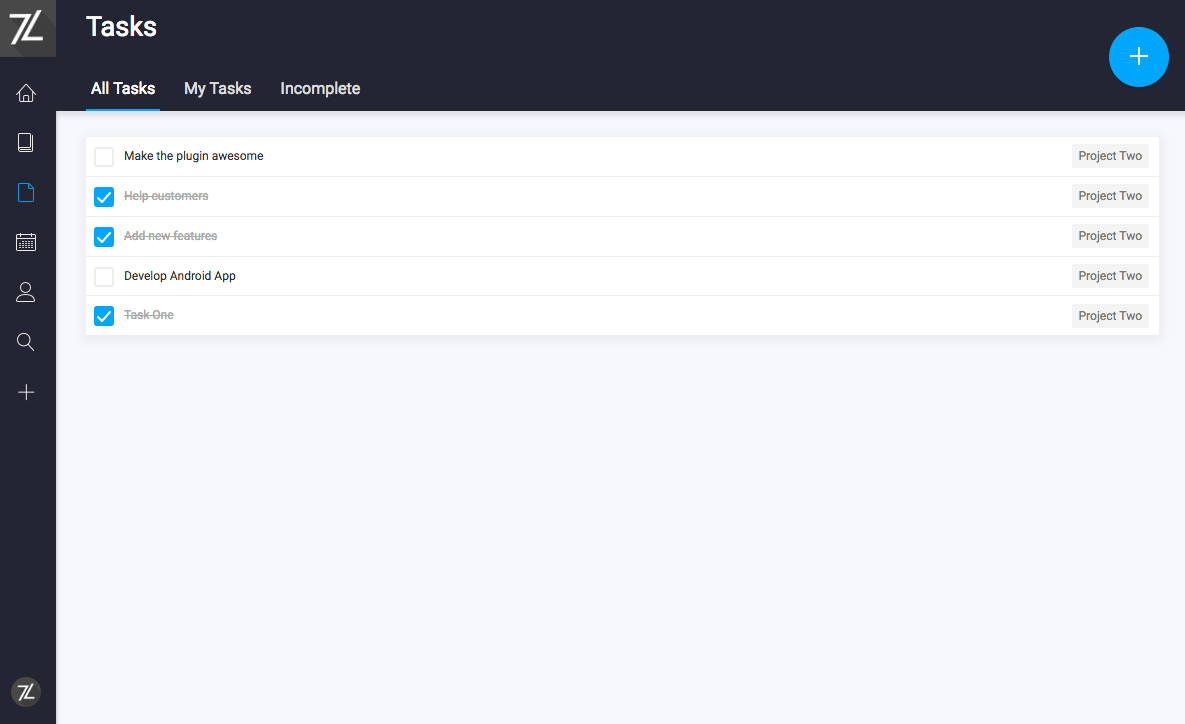
Using the Frontend Project Manager is very similar to the backend version, however the layout is changed slightly.
If users do not have access to the project manager page, they will see a Restricted Access page.